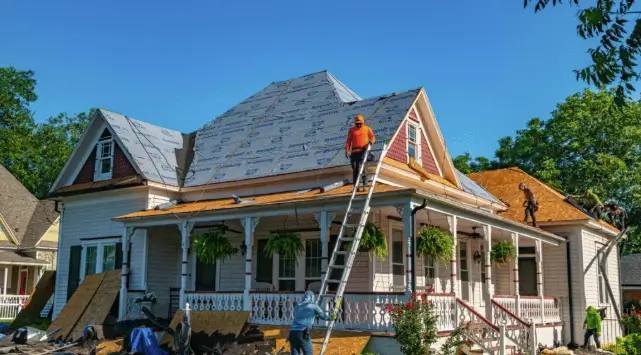
Restoring an aging or historic home doesn’t have to drain your savings or your sanity. Whether you’re tackling water damage, antiquated systems, or decades of accumulated wear, having a clear, sequential plan is genuinely what separates a smooth project from a costly spiral. The EPzA puts it plainly: if wet or damp materials are dried within 24–48 hours after a leak, mold won’t grow in most cases. That single data point tells you everything. Calm, deliberate action beats frantic guessing every single time.
Strategic Preparation for Efficient Home Restoration
Every worthwhile restoration starts well before a single tool comes out of the bag. Skipping the preparation phase is one of the most expensive mistakes homeowners make, and honestly, it’s one of the most preventable.
Thoroughly Assess and Document the Home
Begin with a comprehensive inspection from the right specialists: structural engineers, licensed electricians, plumbers, and hazardous materials experts. Hidden issues, concealed moisture damage, deteriorated wiring, and failing foundations have a way of surfacing mid-project if you don’t surface them first. That timing kills budgets.
Document everything original to the structure. Blueprints, trim profiles, original hardware, built-in cabinetry, all of it. Detailed photographs and written notes become your reference anchor throughout the entire project, keeping your preservation decisions honest and grounded.
To ensure documentation is truly thorough and that hazardous materials like asbestos or lead paint are addressed before anyone lifts a hammer, working with qualified professionals offering restoration services from the very start of this process is essential.
Develop a Clear Restoration Plan and Budget
With solid inspection data in hand, sequence the work deliberately. Stabilize the exterior first. Then address mechanical systems. Save finishing work for last. This order protects what you’ve already completed and prevents the painful cycle of redoing work you thought was done.
Budget with real numbers, not optimistic ones. Historic restorations typically run 20–50% above a standard remodel, and ongoing maintenance should be factored in at roughly 2–4% of the home’s value annually. A contingency buffer isn’t a luxury item. It’s a necessity.
Now that your timeline and finances have a fighting chance, let’s get into what makes a home actually worth restoring.
Preserving Authentic Character While Modernizing
The best home restoration tips share one common thread: honor what already exists before reaching for something new. The soul of any restoration lives in what you choose not to throw away.
Restore First, Replace Only When Necessary
Original woodwork, plaster walls, and historic windows, nearly all of which can be repaired rather than replaced. Epoxy consolidants handle rotted wood remarkably well. Reglazing restores old windows to a fully functional, energy-efficient condition without sacrificing any of their charm.
When replacement is unavoidable, match the original precisely. Same material profiles, same finishes, same proportions. A mismatched replacement doesn’t just look off; it quietly undermines the character of an entire room.
Respect Architectural Integrity with Intentionality
The Secretary of the Interior’s Standards for Rehabilitation exist for a reason. They help homeowners avoid common missteps, adding features that never historically existed, or stripping out the defining details that give a home its identity. These aren’t creative restrictions. They’re value protections.
Knowing when to repair versus replace is genuinely powerful knowledge. Let the architectural language of your home guide every update you make, layering modern elements thoughtfully rather than overwhelming what’s already there.
See also: Why Professional Home Furniture Assembly Services Save You Time and Stress
Integrating Modern Systems Efficiently
You’ve protected what makes your home irreplaceable. Now comes the most technically demanding stretch: weaving in modern mechanical systems without undoing everything you’ve preserved.
Conceal and Optimize Mechanical Upgrades
Route HVAC, plumbing, and electrical upgrades through attics, basements, and wall cavities wherever possible. This approach keeps historic surfaces intact and minimizes the cosmetic disruption that derails so many projects mid-stream.
Mini-split systems and heat pumps are excellent fits for historic homes, efficient, minimally invasive, and ductwork-free. PEX plumbing offers similar flexibility when replumbing is on the table. Both options do the job without requiring you to tear through the original structure.
Boost Energy Efficiency Thoughtfully
Discreet insulation, weather-stripping, and storm windows styled to match the period can dramatically reduce energy costs while keeping your home’s character fully intact. These are among the highest-impact home restoration steps any homeowner can take.
One important caution: don’t over-seal. Historic materials need to breathe. Trapping moisture behind rigid sealants causes far more damage than it prevents. Breathability isn’t a limitation; it’s a design feature built into the original construction.
Smart Materials and Craftsmanship for Longevity
Getting the mechanical systems right is a genuine milestone. But even flawless system upgrades can be undermined by incompatible materials. This phase isn’t optional; it’s foundational.
Source Compatible and Durable Materials
| Material Type | Best Use | What to Avoid |
| Lime-based mortar | Masonry repointing | Portland cement (too rigid) |
| Old-growth wood | Structural repairs | Pressure-treated pine (incompatible) |
| Custom millwork | Trim and molding | MDF in moisture-prone areas |
| Reglazing compound | Window restoration | Silicone caulk on historic frames |
Era-appropriate materials serve both authenticity and longevity. Modern rigid sealants in masonry, for example, restrict breathability and eventually cause spalling, a problem that systematically undoes expensive restoration work.
Hire Qualified Restoration Professionals
Research from IBHS shows that if every home had been built to the FORTIFIED Home-Gold standard, losses would have dropped by 75%. That figure underscores why qualified craftsmanship matters, not just for visual authenticity, but for long-term structural durability and loss prevention.
Seek contractors with verifiable, documented experience in historic preservation. Written scopes of work, clear timelines, and genuine sensitivity to original character are non-negotiables. The right team protects your investment in ways a general contractor simply isn’t positioned to.
Phased Execution and Ongoing Maintenance
With the right team assembled, you’re ready for the most rewarding phase, executing your restoration in the precise sequence that protects every prior decision.
Sequence Work for Efficiency and Protection
Start with exterior stabilization: roof, foundation, building envelope. Follow with mechanical rough-ins. Finish with interior plaster, trim, and period detail restoration. This sequencing is the backbone of efficient home restoration; each phase actively protects the one that follows it.
Lock in all design decisions and required approvals before construction begins. Mid-project redesigns are consistently among the most expensive surprises in any restoration, historic or otherwise.
Commit to Long-Term Care Post-Restoration
A proactive maintenance routine, gutters cleared, exterior moldings inspected, and roofing reviewed annually, is what keeps a restored home beautiful for decades, not just the first few years after completion. Budget for it every year, and don’t wait for visible problems to prompt action.
Frequently Asked Questions
What are practical alternatives when historic materials aren’t available?
Salvage yards, architectural antique dealers, and millwork shops that replicate historic profiles are all genuinely viable options. Custom reproduction materials often cost less than expected and match originals with impressive precision.
How do I safely restore lead-painted trim?
Use wet-cleaning methods to suppress dust, wear proper PPE throughout, and strongly consider hiring a certified lead-safe contractor. Dry-sanding lead paint creates dangerous airborne particles; it’s not a shortcut worth taking.
Can smart home technology integrate without disrupting historic aesthetics?
Yes, with thoughtful placement. Wireless systems, discreetly positioned speakers, and slim-profile smart switches can be installed without any visible disruption to original millwork or plaster surfaces.
Restoring Your Home Efficiently
A successful restoration rests on five pillars: thorough assessment, preservation-first decisions, intelligent systems integration, compatible materials, and phased execution sustained by ongoing care. Keeping these in the right order is precisely how you restore your home without costly, demoralizing backtracking.
Whether you’re working on a century-old craftsman or a mid-century ranch, the home restoration steps outlined here apply broadly. Start with a real plan, protect what’s worth saving, and commit fully to the long game, and your home will reward that discipline for generations.
